The Half Bath Under the Stairs- The Big Reveal!
This is a very exciting post. After all the water damage and rotten floors and racoons and dust… I finally have a FINISHED room to share.
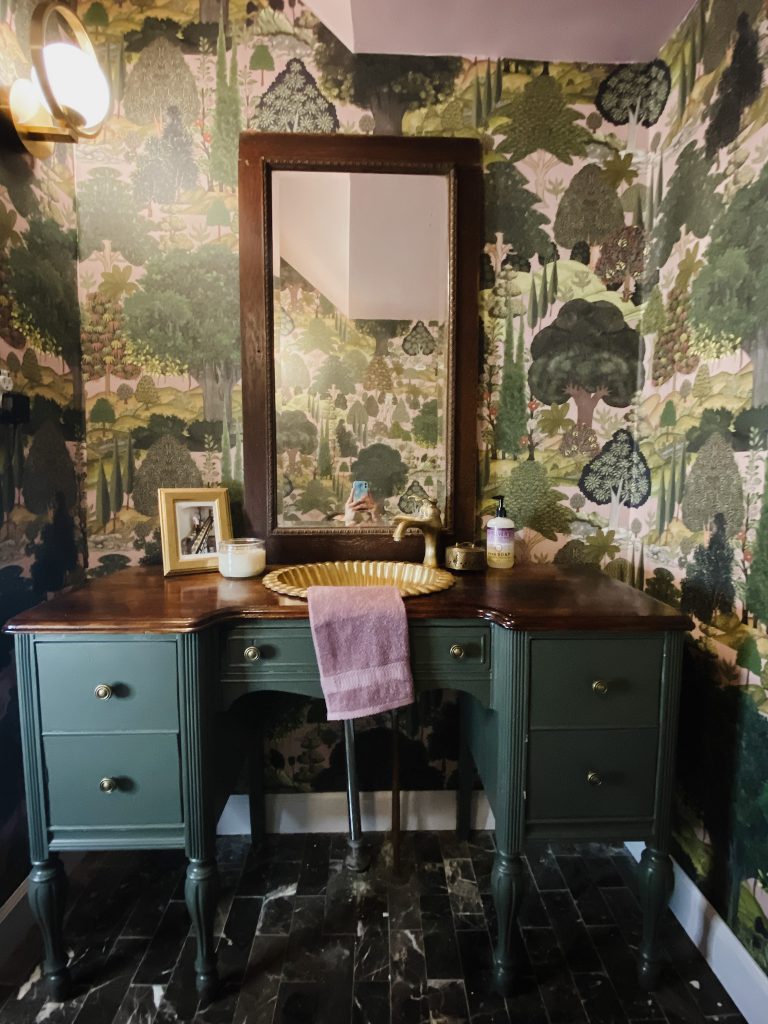
The Mclain House half bath is one of those rooms I liked immediately the first time I saw it. It’s this funny little room with angular ceilings, and it had the most fabulous vanity in it when I bought the house.
The room itself is not actually original to the house, it’s situated where the original service stair would have terminated. Basically, in the 1950s, the family that owned my house decided to move to the first floor, and rent the upper floors. This meant they needed a bathroom, so they ripped out the bottom half of the staircase, and put one there.
Historically, there was a side door off of the alley that led to this part of the house, so servants and deliveries could come through the alley, enter the service door, and then go back to the kitchen or up the stairs to the upper levels. When the new bathroom went in, the stairs were removed, and the doorway was bricked in.
While I would love the functional uselessness of that feature, I am happy to have a bathroom on the first floor for guests, and I like that it feels like a funny little jewel box of a space.
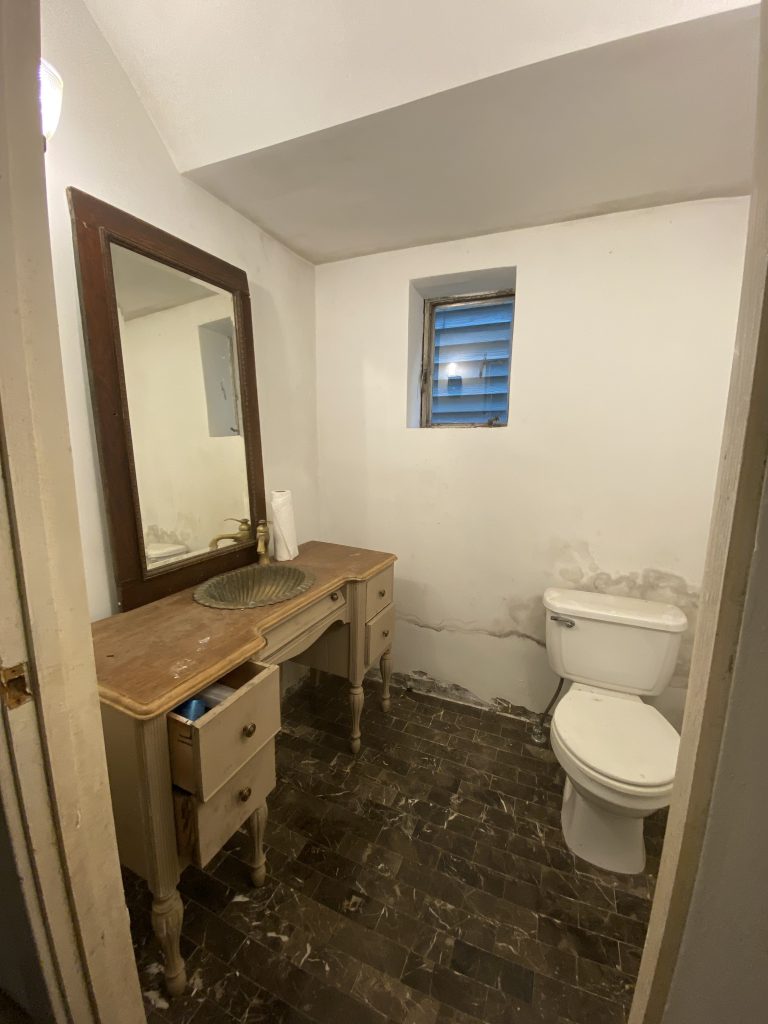
If you don’t remember, this is what the space looked like the day I bought it
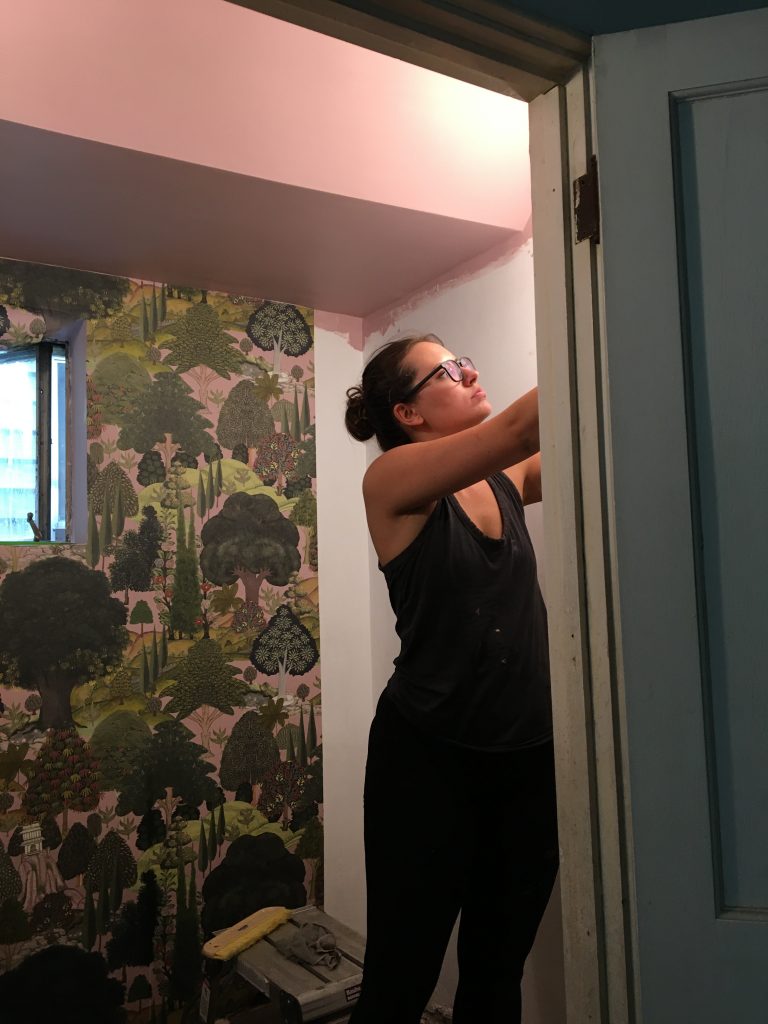
And so, with the threat of entertaining on Labor Day without a bathroom for guests to use looming… I set to work on the half bath this summer.
The Wallpaper
Actually, I started thinking about this room last summer, right after I bought the house. The room had good bones to start with, namely in its excellent marble floor tiles, and cute sink and vanity. I knew I wanted to keep these elements, and I knew I wanted some funky wallpaper that would feel like an unexpected surprise when someone walked in.
I ordered about six samples from Burke Decor, and went through the very scientific process of my boyfriend and I assigning them a value from 1-10. Shocker, we didn’t really agree.
Then I put the options on Instagram for everyone to weigh in. Once again, my first choice came in dead last. You all (and Dan) overwhelmingly favored the green ferns on the blue background.
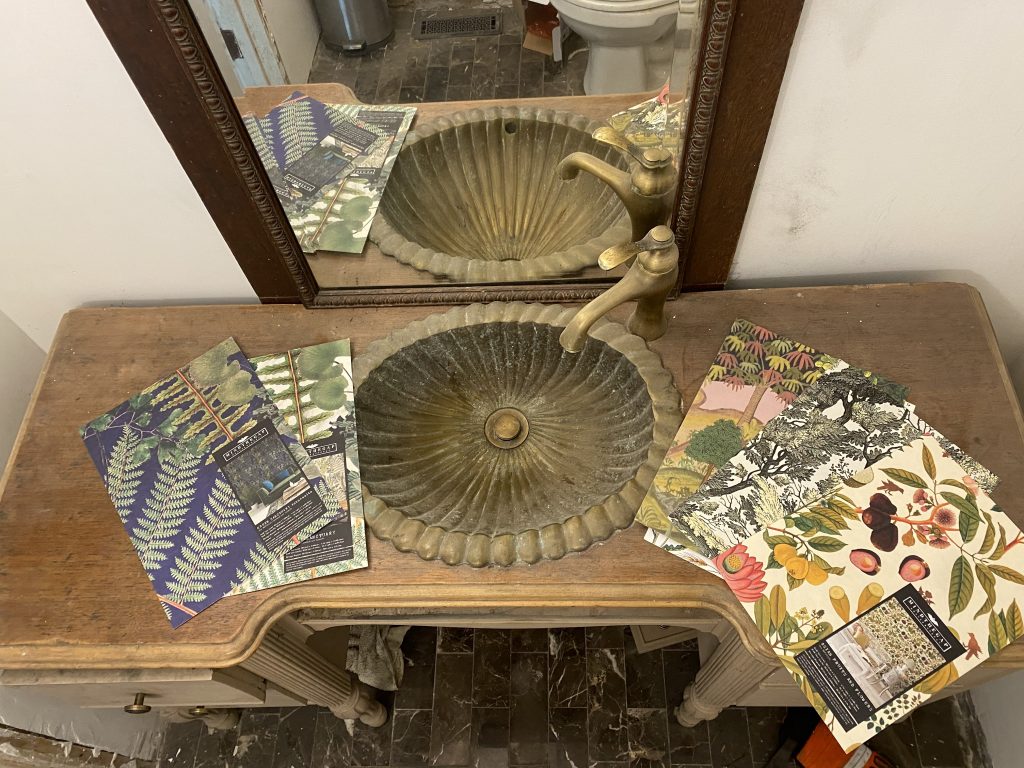
So why did I end up with the green and purple crazy trees? Because I realized that I liked that wallpaper not only because of the way it looked, but the way it made me feel. I absolutely fell in love with this wallpaper from Burke Decor
One of the prettiest and most underrated scenes in my memory is the way certain landscapes look in early spring, when some trees don’t have leaves, some are brand new and bright green, and when the redbud trees (which are usually actually purple) bloom ahead of everyone else. Where I am, in Wheeling, this landscape is most often seen driving through rural eastern Ohio, where reclaimed mine land has been turned into public land, and planted with a variety of species. This wallpaper reminded me of taking those Sunday drives, when spring is just beginning and the sun comes out for what feels like the first time in an eternity. For that reason, I knew I liked that wallpaper not because it was trendy or striking, but because it would always elicit those feelings in me, and really, isn’t that what we’re all looking for in a powder room?
One of the major issues in the half bath was the rising damp and mold on the exterior wall. This was addressed largely last summer, when we repointed the exterior brick that was allowing moisture to creep in. After some experimental treatments, I determined that the mold was actually not as bad as it looked, and pretty surface level. I gave the plaster a light sanding which removed most of it, treated the walls with a bleach mixture, and then applied a skim coat in the areas that needed it. After that, everything got several heavy coats of Kilz mold killing primer, the ceiling was painted, and we were ready for wallpaper.
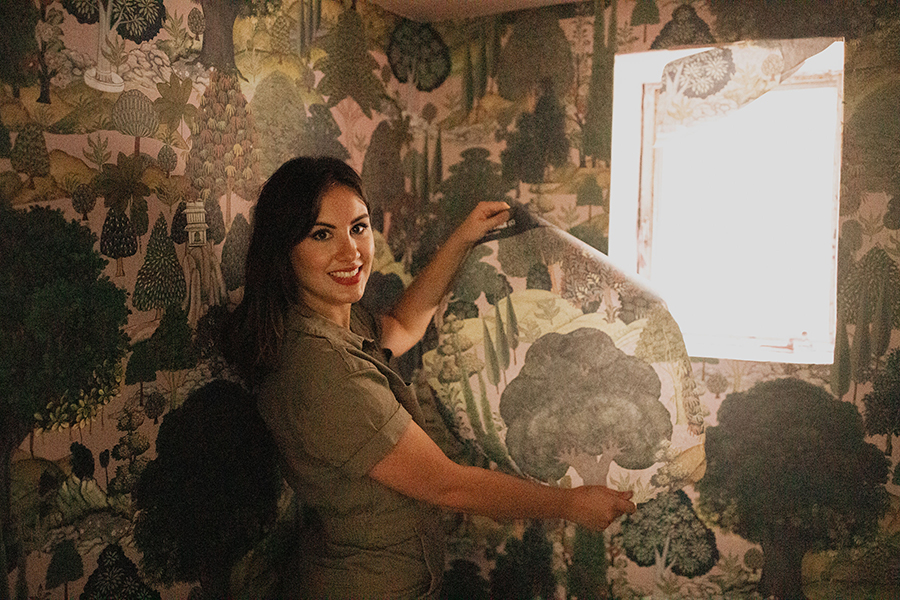
I could talk about wallpaper for days, but if I have anything to say, it’s this: It is not that hard to hang wallpaper, and if you like it, do it! Seriously. The first attempt is intimidating, but once you start, you realize it really is as simple as matching the pattern, smearing some glue on the wall, and doing it. I think in the world of youtube tutorials and manufacturers’ ten page instructions things can get a little overwhelming, but try to remember, this is something our grandmothers did with five kids running around and no internet. You are a highly educated individual. You can hang wallpaper.
So one weekend my mom and I set out to hang this wallpaper. It has a three part repeat, which means you get three different rolls to work from simultaneously, and you hang them up in A, B, C order before repeating. This really doesn’t make things harder, but it is slightly more wasteful, so order extra. You always want to have plenty of extra wallpaper on hand in case you have wall damage or something like that. Plus the scraps make fun wrapping paper.
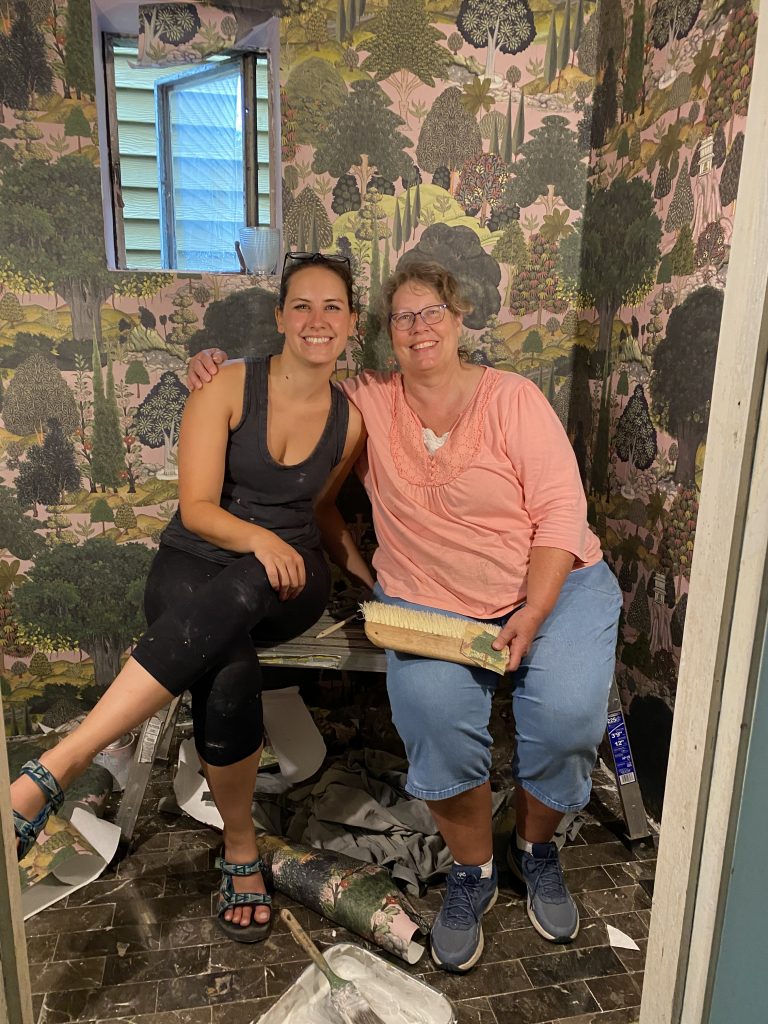
All in all it took us about ten hours to paper the whole room. We removed the toilet and vanity to make the cleaning, painting, trim, and papering much easier. Highly recommend the hour of grumbling it takes to move a toilet to prevent the days of torture that working aorund a toilet guarentees.
When it comes to wallpaper, here are my insider tips:
- Pick and organic pattern. Curvy shapes are way more forgiving than a tiny geometric pattern
- A white background is also helpful. You will not notice a teeny tiny gap on a white paper. It will stand out like a sore thumb on a black paper
- If you cannot enjoy the process and accept that your wallpaper will have a flaw here and there, hire someone. Home decor should be fun, not send you into fits everytime you look at it.
The Vanity
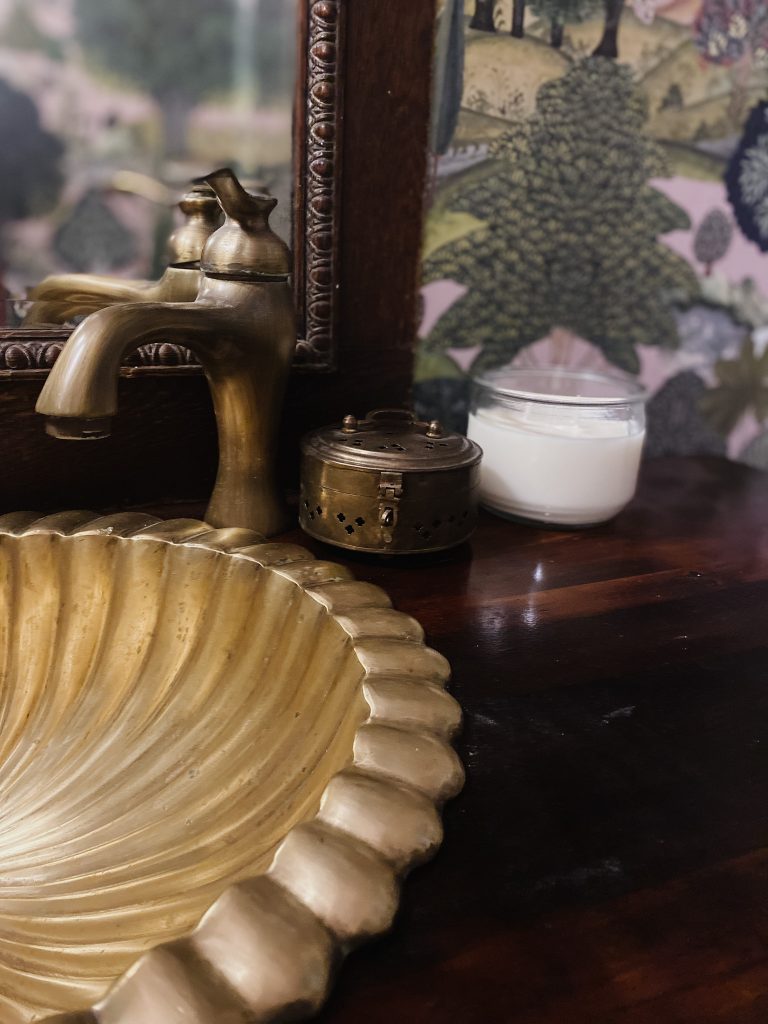
The other major part of this project was the vanity. As I’ve said, the vanity and the floors were in the house when I bought it. I loved the vanity instantly. I did not love the color, or the dingy appearance of what I knew was a beautiful sink.
Admittedly, I can’t take much credit for the vanity. My mom actually refinished it. She’s newly retired, and very crafty, so all I really had to do was shove the thing in my car and drive it to Pittsburgh. A week later, it miraculously appeared at my door looking brand new.
The process was pretty simple, mom prepped the body of the vanity and painted it a nice green that matched the wallpaper. The vanity top had an old, cracked and lifting wood veneer, so she removed that, sanded the wood beneath, and applied four coats of a poly stain combo that gave a nice sturdy, shiny finish that so far, is repelling water like a dream. Finally, she spent “a million hours” scrubbing the sink with brasso to give it that shiny new look. We lined the drawers with wallpaper and voila, a beautiful vanity that cost nothing more than paint, stain, and my mother’s time. Thanks mom.
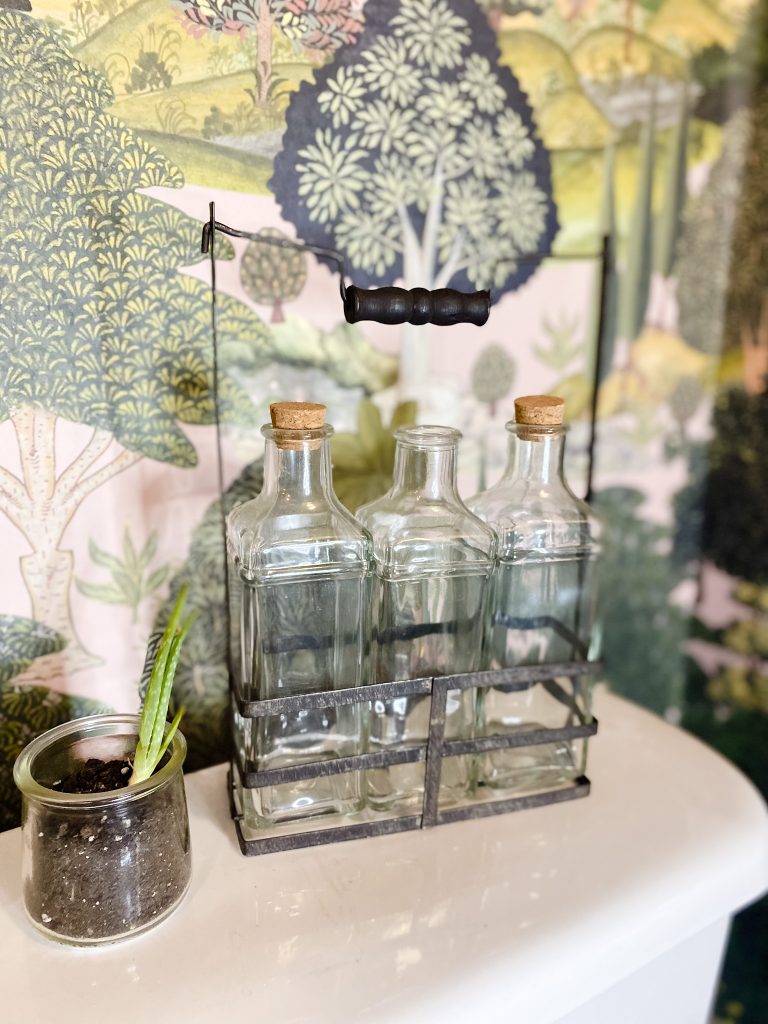
The Accessories
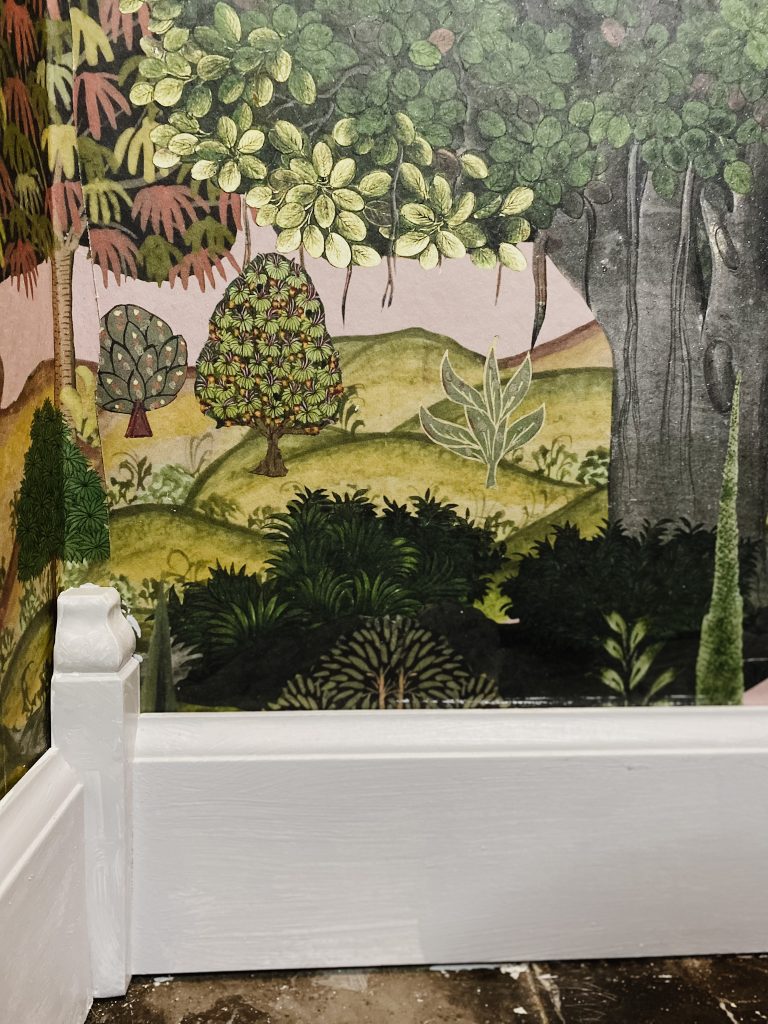
Once the heavy lifting was finished, there were really only a few little things left to do. This space was added, so no original trim, so in the interest of expediency, and the ability for someone to recognize this was not an original room, I added some big box trim, with my signature corner moulding.
I love corner moulding because 1. It’s decorative and fancy, and 2. It means you can make a regular cut on the end of your baseboard rather than messing with the perfect angles meeting in the corner. This is something I hate to do, and I have a fancy house anyway so every single baseboard I install has this corner moulding. When you buy it, you either buy inside corner moulding (for inside corners, think concave) or outside corner moulding ( for outside corners, thin convex). You’ll use inside moulding more often than outside, and a lot of times your bigger box stores will only have inside corner moulding. These are the ones I bought for my non-historic half bath. You can also get reproduction ones like this (which is actually a perfect match for my house) that I’ll buy for rooms I’m restoring.
I also added two wall sconces that I partnered with Lamps Plus on. I love that they’re modern and brassy and throw a lot of light into my dark little room.
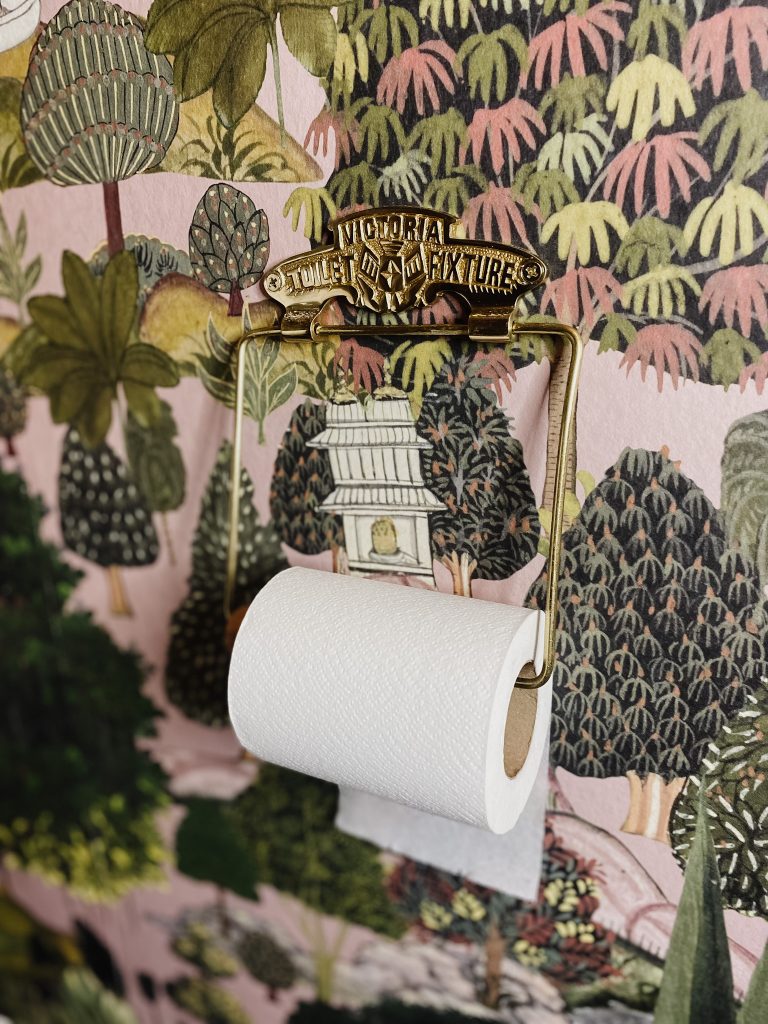
Finally, I had to address the toilet situation. The toilet that was in this space was perfectly fine, so after a heavy duty scrubbing, I decided to just keep it. The only problem was it was so WHITE. And the whitest thing about it was the cheap plastic seat. So in an effort to tone things down, and bring more quality materials into the home, I decided to swap it out for a traditional wood toilet seat and brass hardware to match the rest of the room. I really like the seat and hardware I found on amazon. They’re substantial, and feel like they’ve been there for a hundred years and will last a hundred more.
I also picked up this vintage inspired toilet paper holder because it matched, was cute, and felt appropriate in the room. It’s not the most substantial piece of hardware, but it scores high for affordability and style.
And that’s it! I still have a few random things I’d like to address, like replacing the old 1950s casement window, getting a pretty brass flush handle, and flipping the door around so the stained side faces in, and the painted side faces out. But for sanity’s sake, I’m calling this room finished… for now.


So how did it come out in terms of budget? Let’s find out together. I’m more of an “ish” person when it comes to budgeting, so this is the first time I’ve put pen to paper on this one.
Walls
Kilz Mold Killing Primer $20.00
Pint of pink ceiling Paint $12.00
Bottle of bleach $2.00
Burke Decor wallpaper $220.00 per box x 3 boxes $660.00. Burke Decor was kind enough to partner with me on this project, but I feel it’s important for people to know what the real cost looks like.
Wallpaper glue $20.00
Sconces $129.00×2= $258.00 Lamps plus was kind enough to partner with me on this project, but this is the real cost for the product.
Floors
Marble tile I kept $0
Millwork
5” baseboard from Lowes (2 12’ lengths) $50
Corner Moulding $1.28 x 4= $5.12
Vanity
Minwax Polyshades Stain and Primer Combo $10.00
Pint of green paint $12.00
Sink- $0.00 but $5.00 for a container of brasso
Plumbing $15.00 miscellaneous fittings
Toilet
Toilet paper holder $20.00
Toilet Seat $45.00
Toilet Hardware $18.33
Lights
Grand Total
$1,152.45
So for about $1,000.00 I was able to finish my half bath. Using the existing tile and salvaging the vanity were huge money savers, and it just goes to show how an object can be styled differently to create a totally new space. If you didn’t have these things already, facebook marketplace, craigslist, or your local salvage shop would all be great places to look and generally have lots of options for these things. It’s way easier to salvage materials for a small room than a large one!
I love this room now, and I can’t thank Burke Decor and Lamps Plus enough for providing me with beautiful materials. Let me know what you think!


I’m sure I voted for the wallpaper you picked.😉. It looks great!
Beautiful
Absolute little jewel box!!! A job well done! Wallpaper is fabulous!
Love it! The wallpaper is fabulous!
You will certainly have a dinner guest spend way too much time in the bathroom lost in the visual forest after having one too many glasses of wine!
love it!! i absolutely love your wallpaper choice.
An adorable space! I really like your corner molding, it looks fantastic.
It looks AMAZING!
This is so stunning, and I have enjoyed your journey so far! Thanks for sharing!
Beautiful! That vanity and sink are the stars of the roo!
BETSYYYYYYY! This is amazing! I am in love! Thank you so much for your hard work and willingness to share. I so love the transformations!
Thanks Megan!!
Explicit taste indeed! I’ve been waiting anxiously to see the next completed room. Absolutely worth the wait, as I am sure you can say the same thing! Will continue to anxiously wait for the next group of photos.
So lovely. Everything turned out just right. Love the wall paper.
I’m generally not a big fan of wallpaper, but I really do like what you put up. I love the colors and they are somewhat subdued which would totally work for me. I love the vanity and the color that you painted it. Can’t wait to see what the rest of the house looks like. Great job.
Just beautiful, so excited to see this historic home being restored. Welcome to Wheeling!
I like the sink base. Great idea
Love this wallpaper, so fun to look at and beautiful colors
I love how the cloakroom is shaping up and that you were able to save the vanity unit and sink. Opinion on how to hang the lavatory paper roll is divided, but I prefer to pull from over the top and not from the back.