
The Kitchen Reveal Part II
This is Part II of the full kitchen reveal. To read about the layout and cabinetry, check out Part I here.
Once the layout was decided, the cabinets were in, and the bulk of the budget spent, I was prepared to take my time with the finishing touches… Just as soon as I was over the last hurdle, the ceiling.
The Ceiling
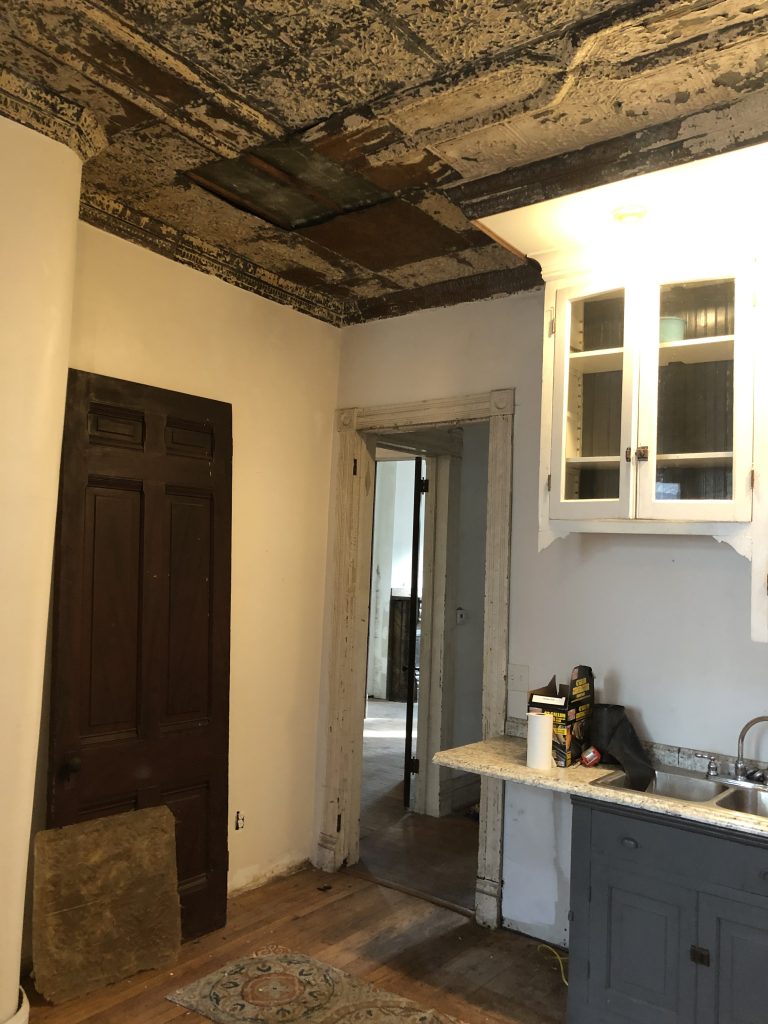
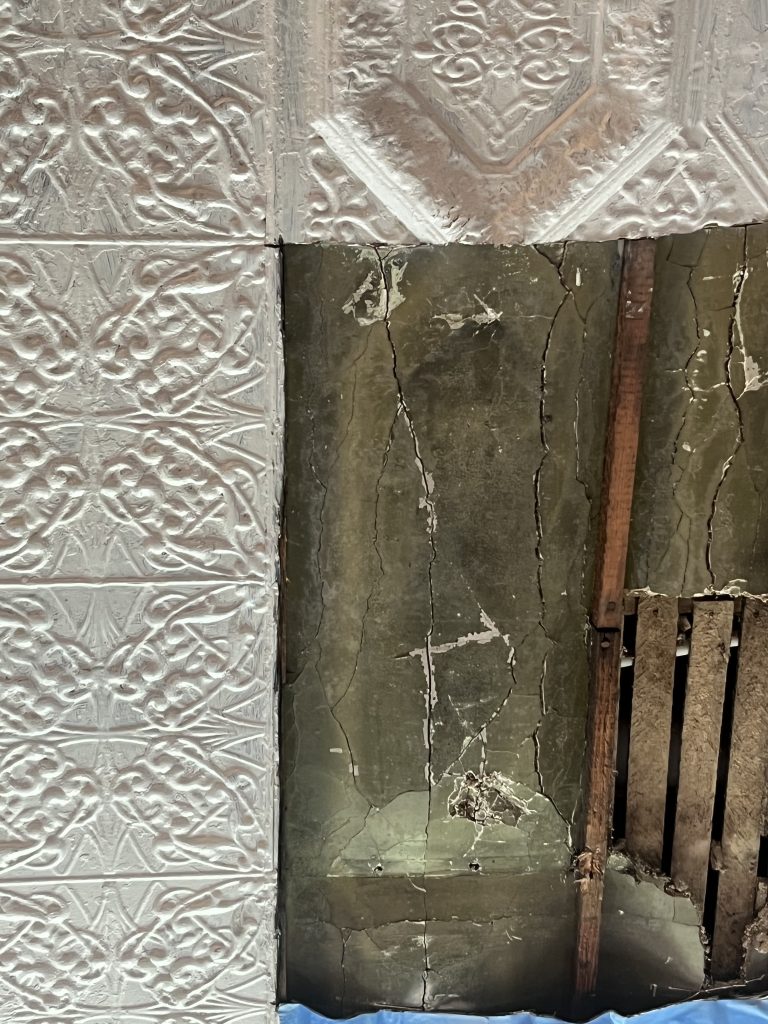
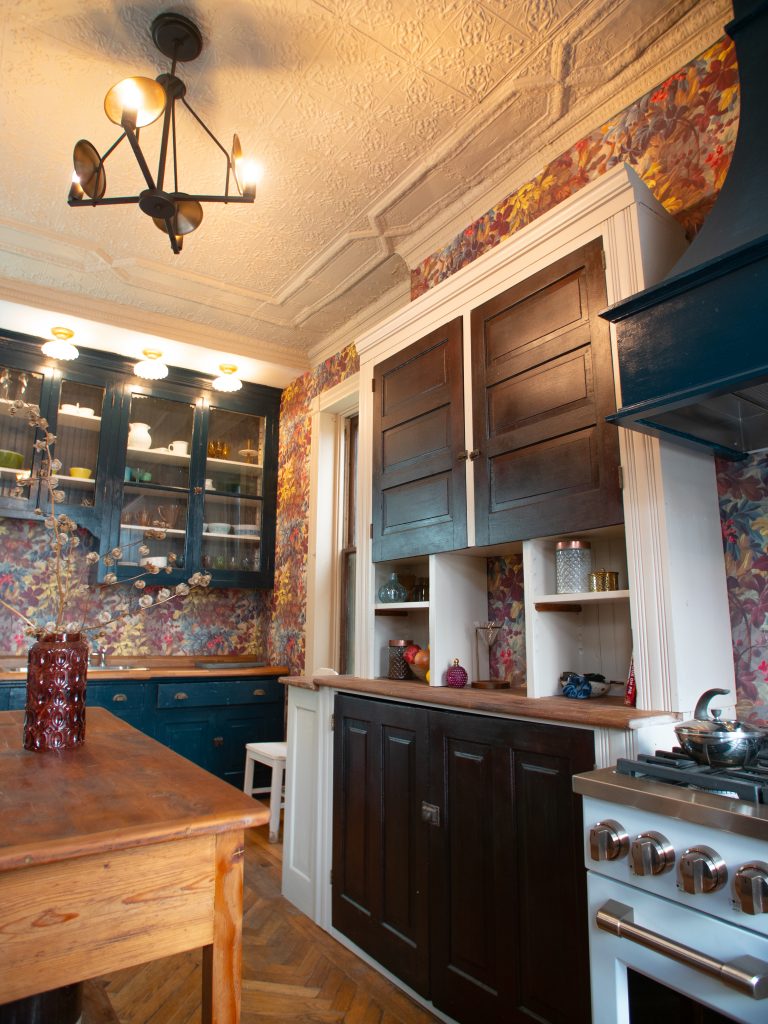
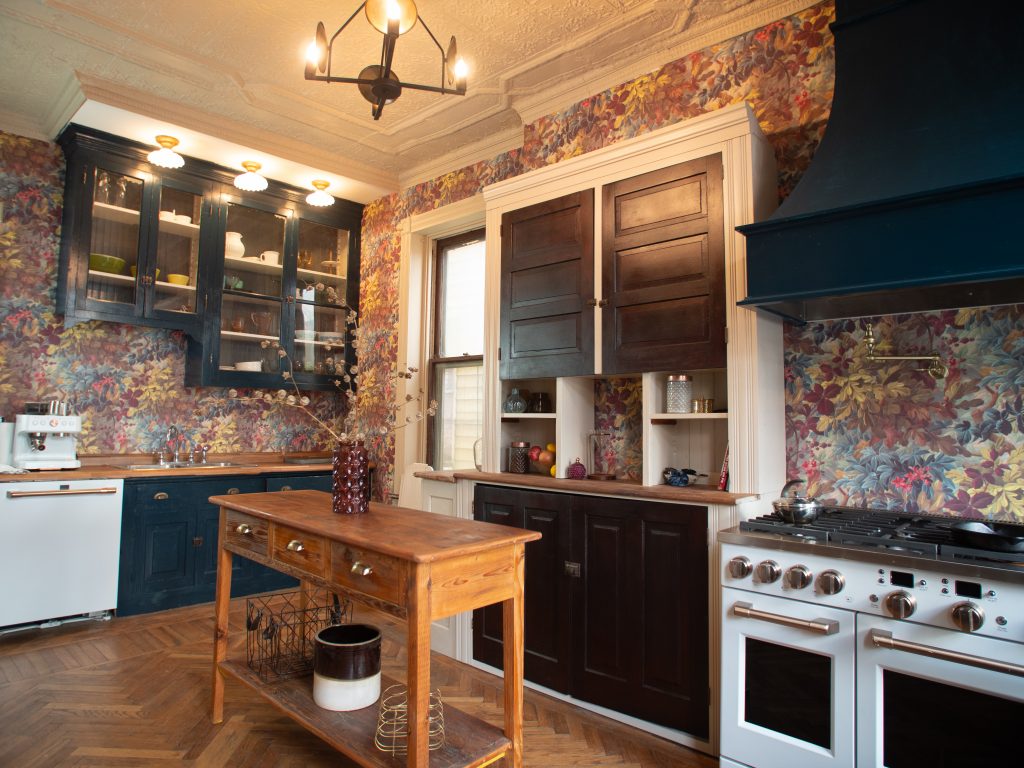
From the first time I saw the Mclain House, I loved the ceiling. I think it provides texture and interest and is something most houses aren’t lucky enough to still have. That said, it also was in not so great of shape, and virtually impossible to find replacement tiles for.
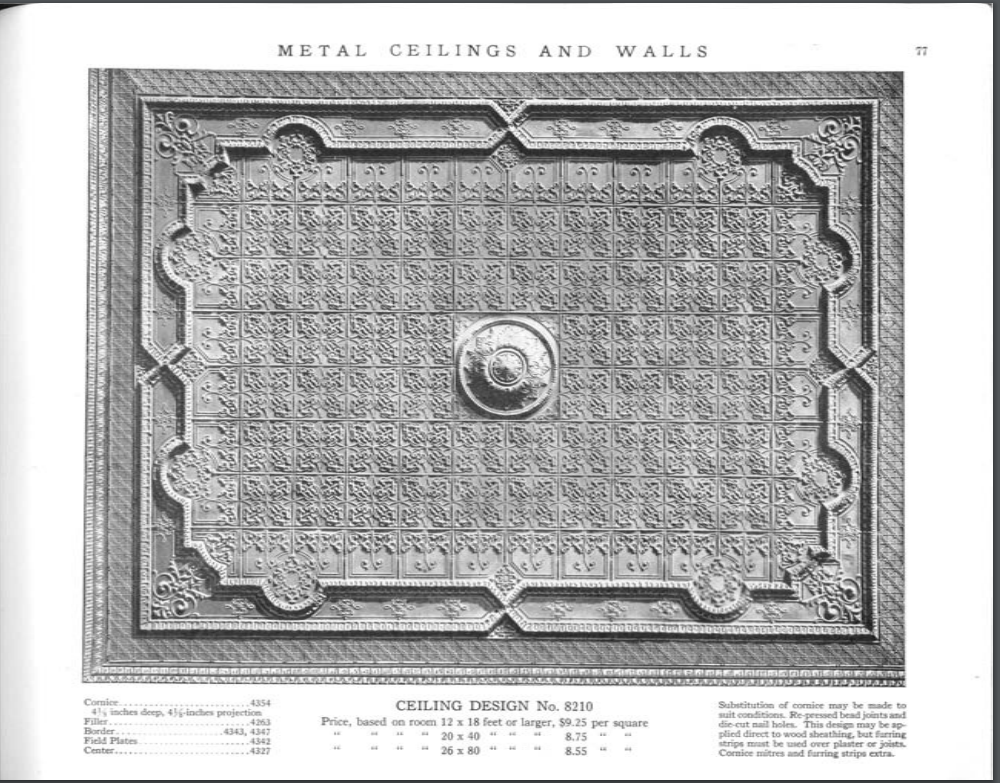
For those that aren’t familiar, tin ceilings, or more accurately, pressed metal ceilings, are made when a big sheet of metal is pressed with a large decorative stamp. These ceilings first appeared in the 1870s, but by the turn of the century decorative metal ceilings were all the rage. Wheeling Corrugating was the leading producer of these ceilings, meaning my ceiling was likely made just a few blocks away.
Metal ceilings came in parts, and so the cornice, decorative border, field pattern, and any other decorative elements were interchangeable. It’s common to see a pattern repeated, but rare to find a multi element ceiling exactly like another. I was able to find the field pattern in an old Wheeling Corrugating catalog, though the frame, center medallion, and cornice are different. And as cool as it was, a hundred year old catalog was not going to help me with replacement tiles.
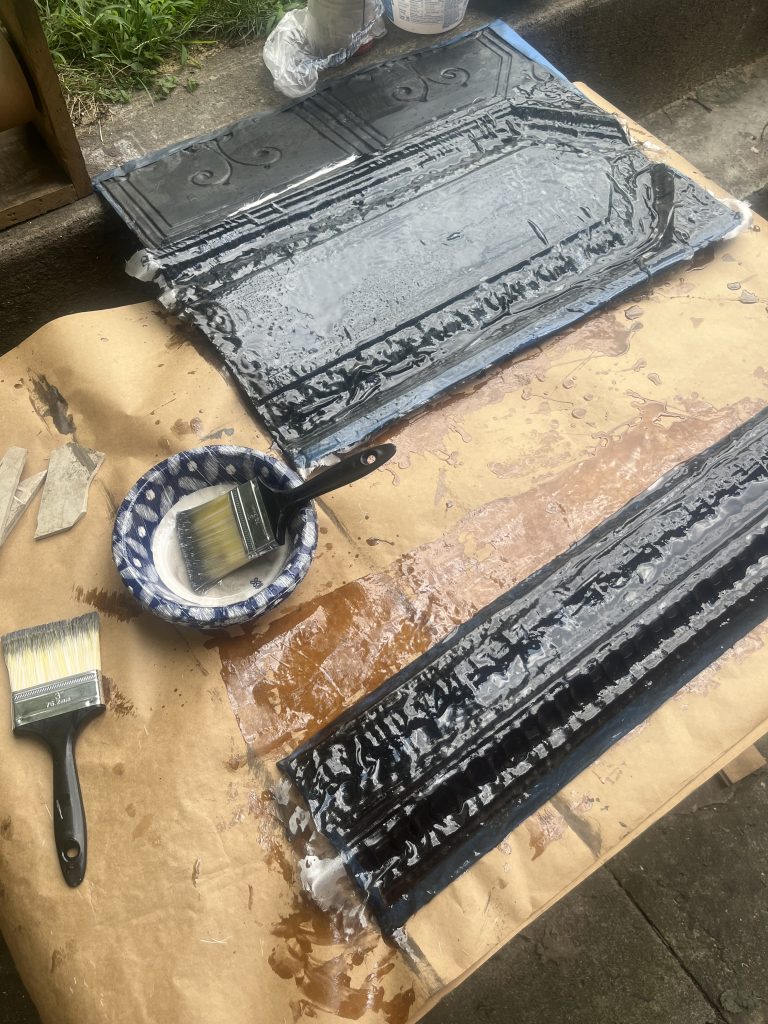
Now, there are a few websites where you can get new pressed metal ceiling tiles in historic patterns, but none of them had mine. Another option is to take one of your originals, mail it to one of the few manufacturers in the U.S., and have them create a new custom stamp based off your sample, and then stamp as many new panels with that pattern as you need. I had hoped to do this, but for about eight panels I was consistently quoted over $10,000 and that just wasn’t going to happen. So, we went the DIY route.
Lucky for me, I live across the street from a metal artist, who had replicated metal ceilings before and offered to help me for….much less than ten grand. The process was fairly simple: almost like using a baking mold. We took down the pieces that we needed to copy, greased the backs with some cooking spray, lined them with a fine fiberglass mesh, and then mixed a two part polyester resin (insert link) and poured it in. Once it was set up we popped them out and they you have it. The new pieces aren’t perfect, and are much more brittle than metal, but once they were on the ceiling and painted I can hardly tell.
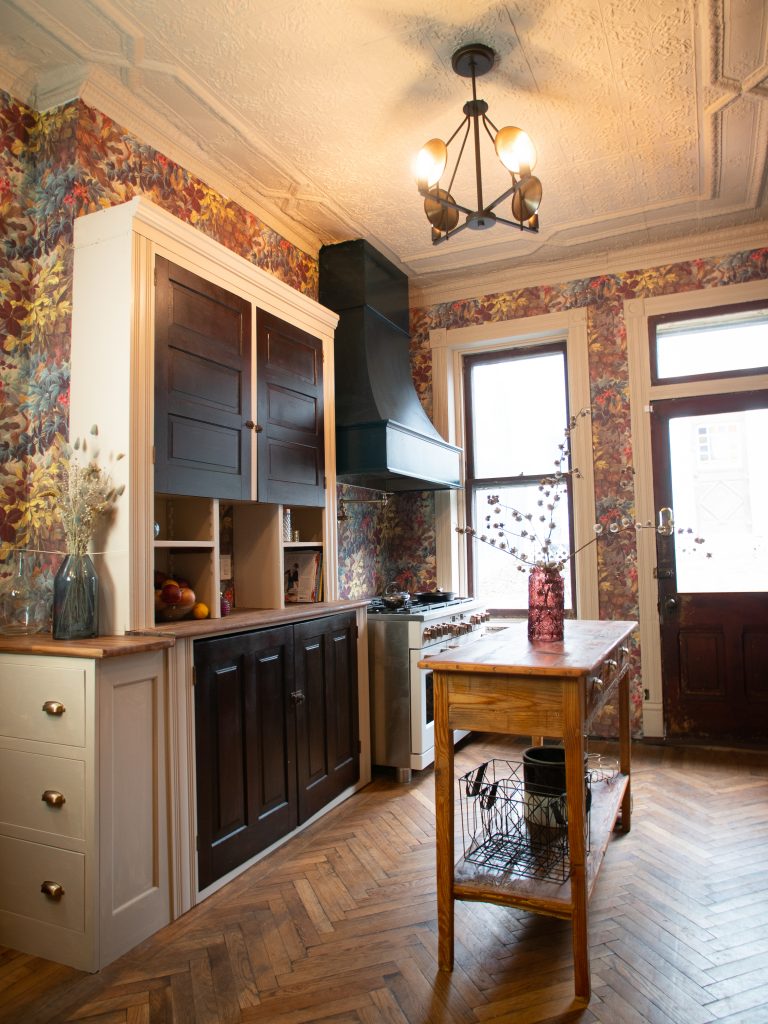
During this process we found the original painted plaster ceiling behind the panels, confirming my theory that the second owners of the house- the Horkheimers, had a major role in the decorative additions to the house. The original ceiling was painted a deep green, and while I entertained the idea for a minute, I decided to paint the ceiling the same cream color as the trim.
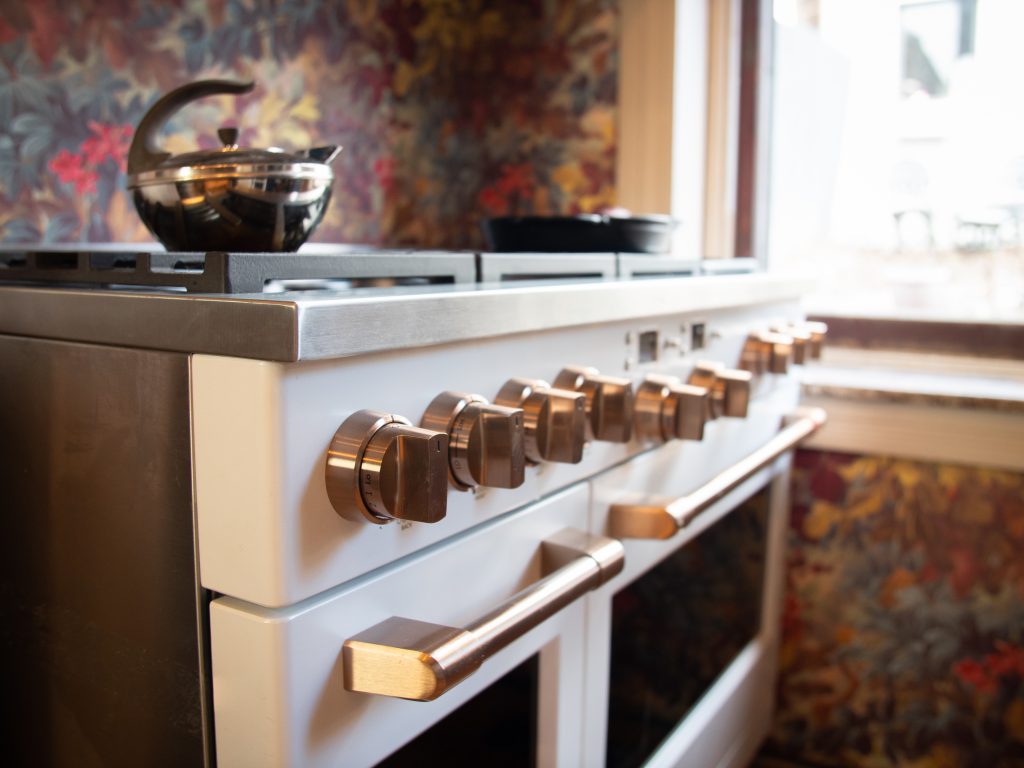
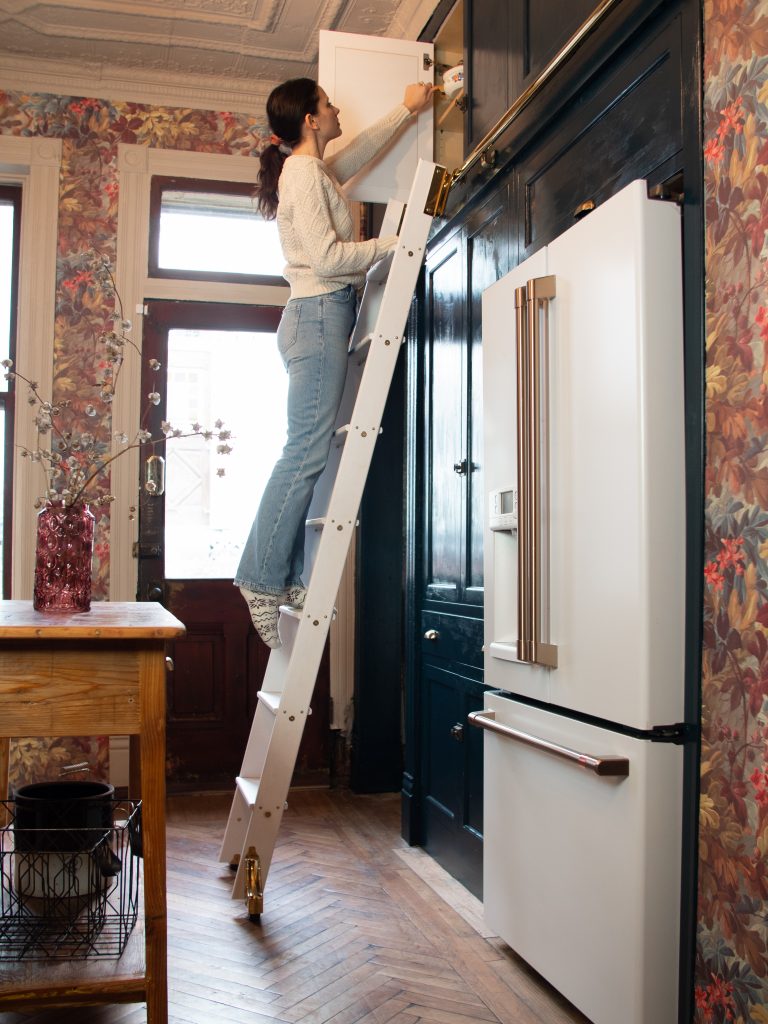
The Appliances
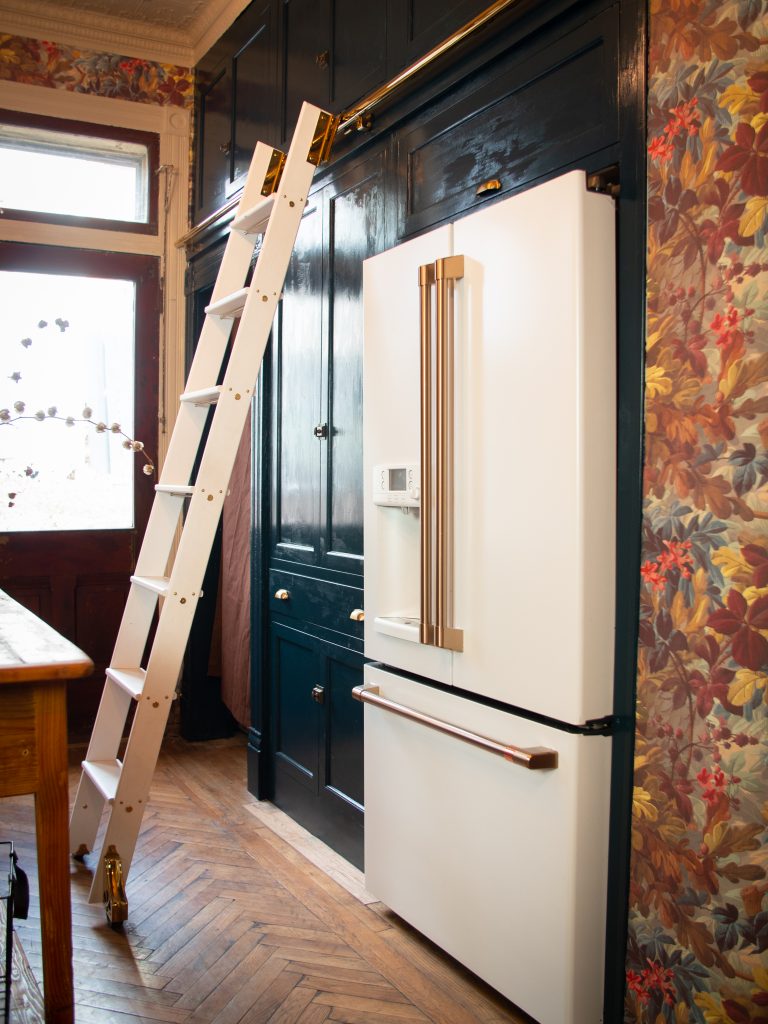
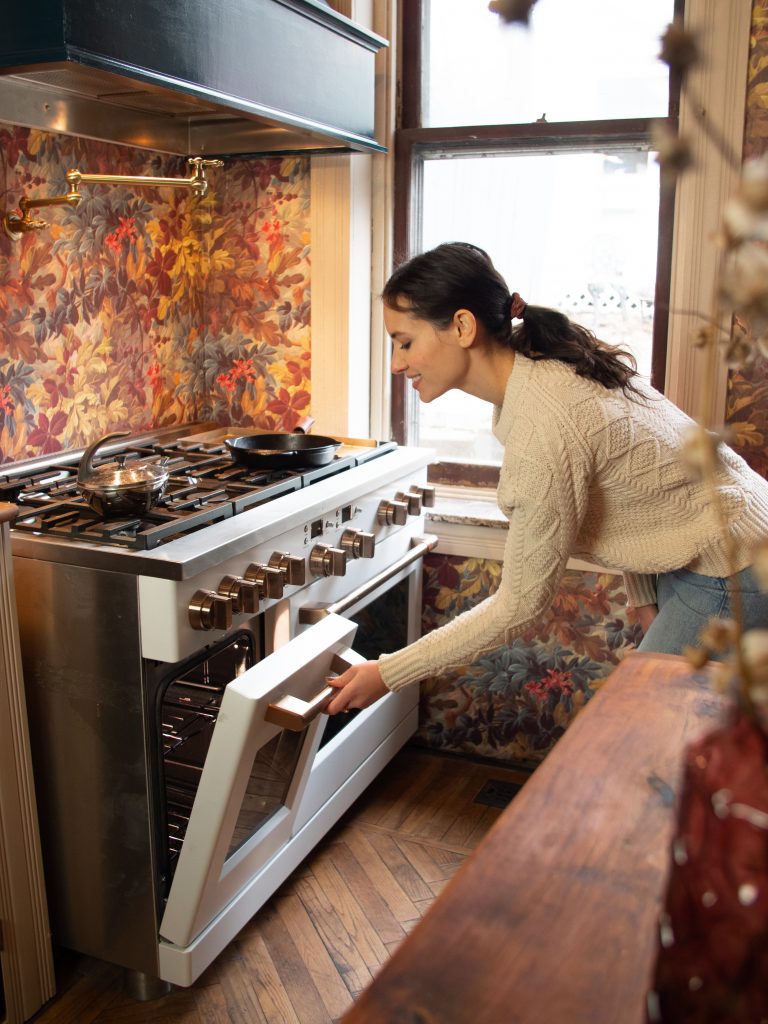
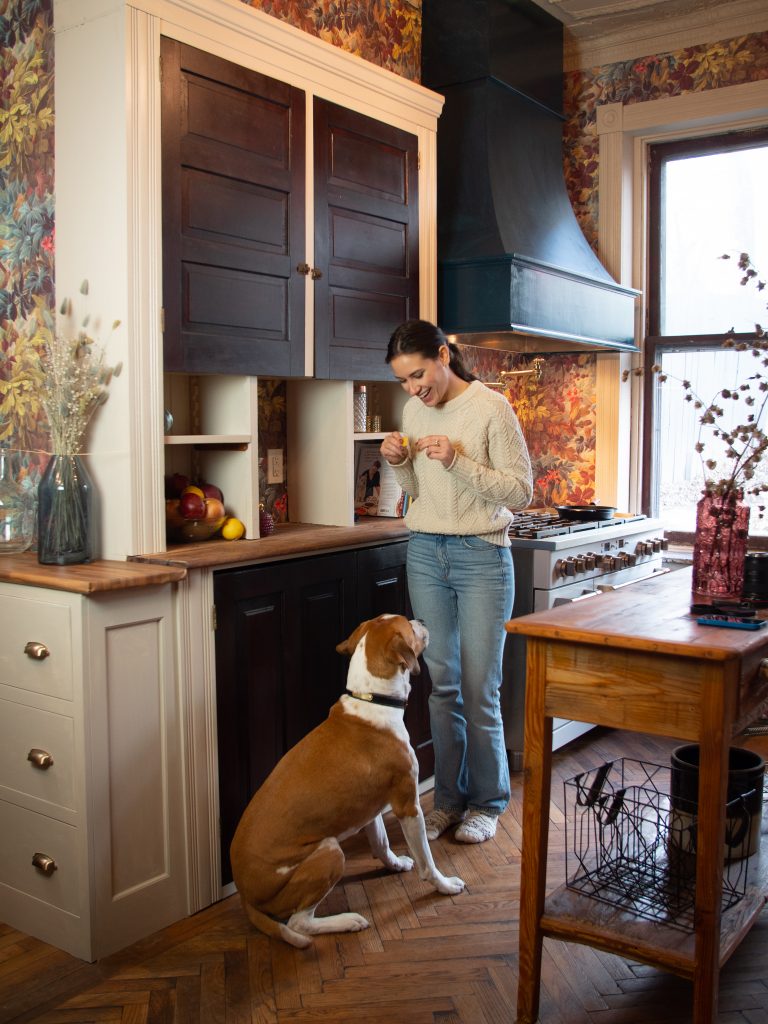
From the very beginning I knew I wanted professional appliances. Despite being an only child, I have it in my head that at any time I need to be prepared to cook a dinner for 20. And now I am. The oven in particular was something I was not willing to compromise on, and when the opportunity to work with GE came along, it was an absolute dream come true. I’d had my eye on the Cafe line for quite a while, and it’s proven to be even better than I could have imagined. I’ve never been a huge stainless steel girl, so I chose white appliances with warm brassy bronze hardware. Everything about these appliances is luxurious, and I couldn’t love them more.
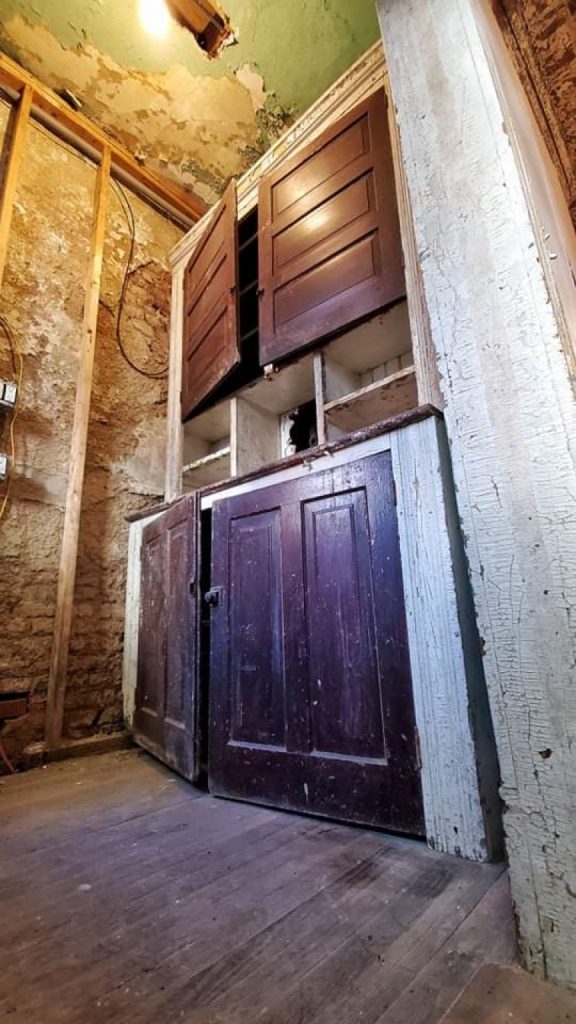
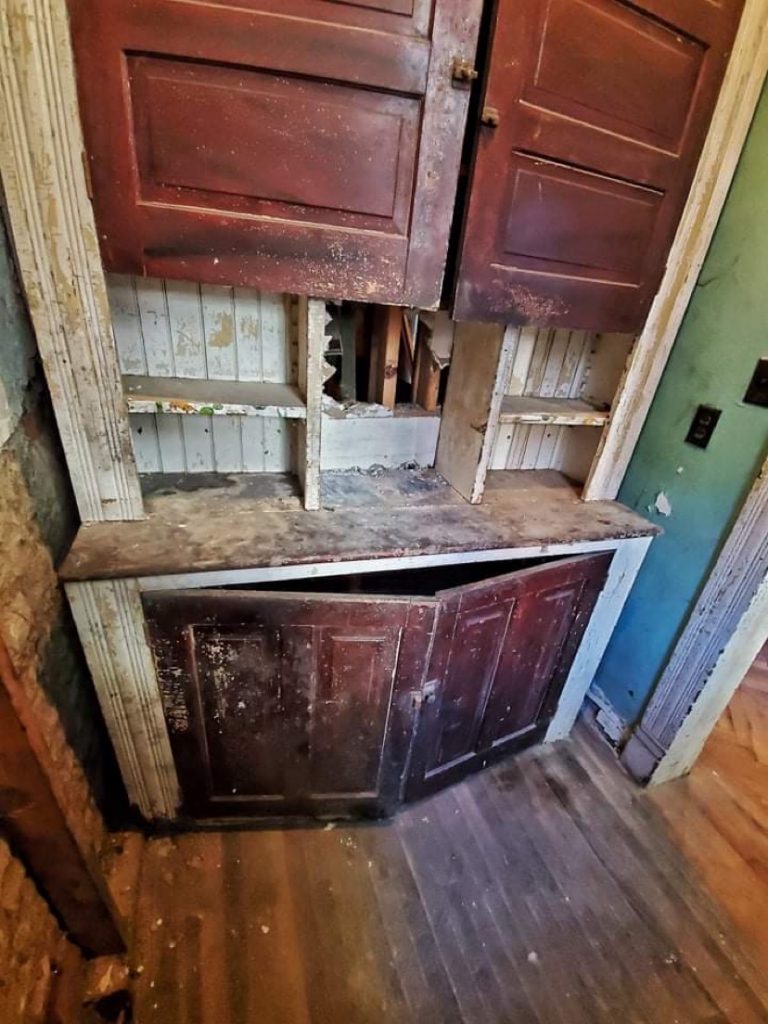
The Butler’s Pantry Cabinet
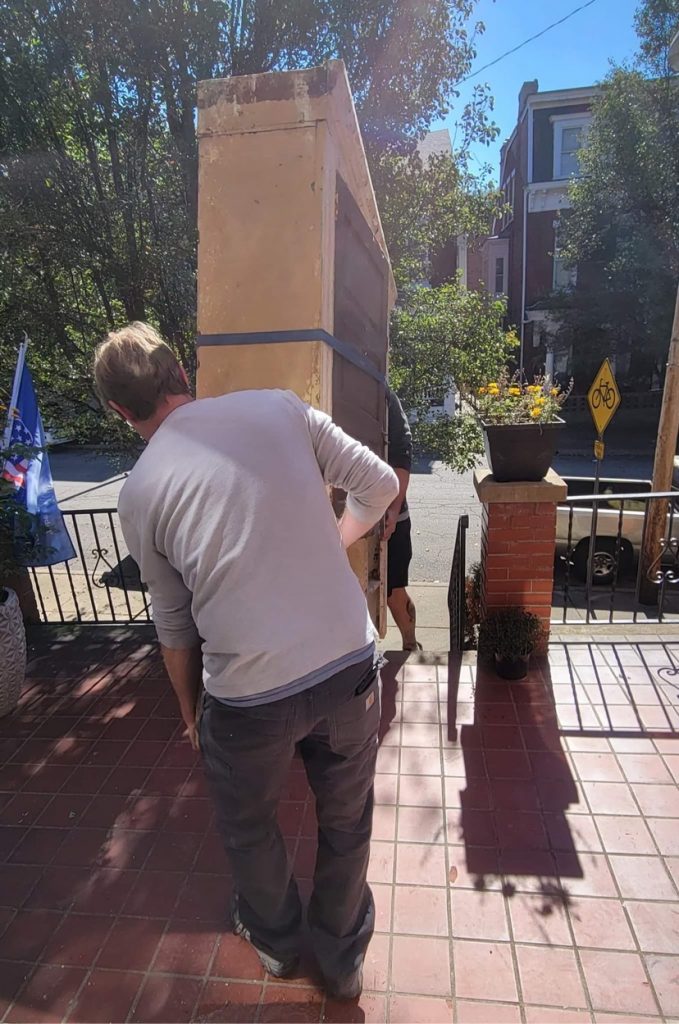
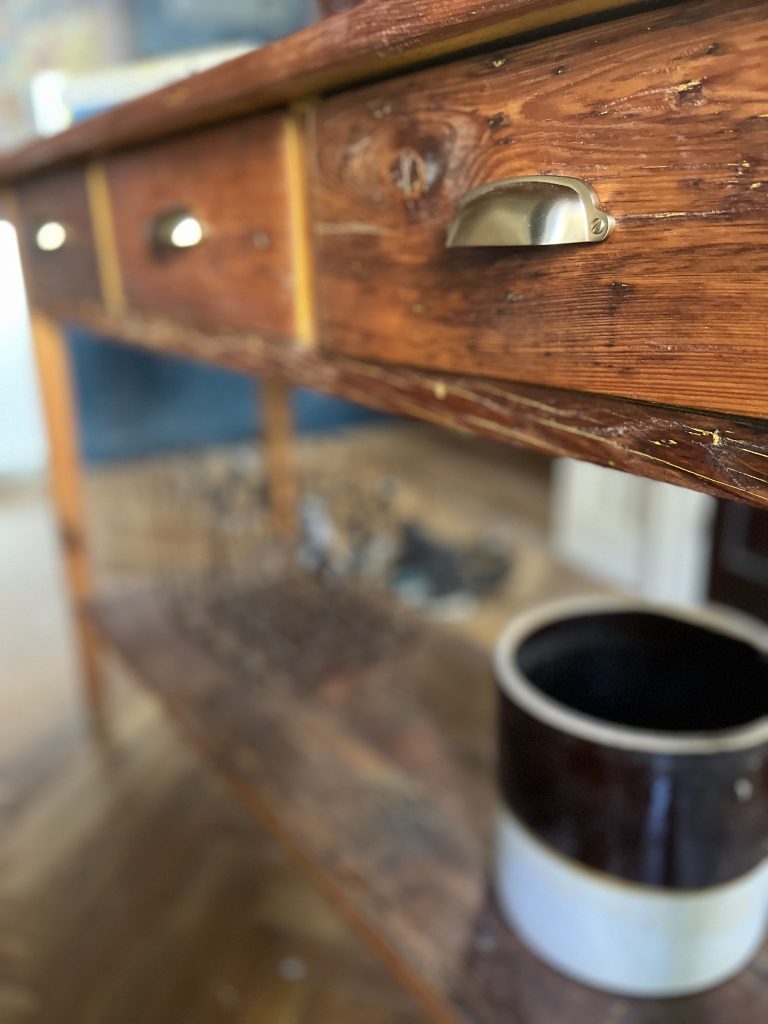
Ah, the Butler’s Pantry Cabinet. This was one piece in the kitchen that was old, but got a totally new life. This poor cabinet was held together by cobwebs when I first bought the house. Because the Butler’s Pantry had been reconfigured a bit over the years to account for basement steps and later a fridge, this cabinet was in its original space, but no longer built in as it would have been. It was filthy, missing a bottom to hold it together, and hanging on by a thread. I hired local furniture refinishers Brandon and Melissa Holmes to cut it out of the pantry, haul it back to their shop, and perform the greatest makeover ever.
The faux grain finish matched the woodwork of the house, but was so damaged it ended up having to be completely removed and replicated. The missing base was constructed and offered some much needed stability. Each shelf was lovingly stripped and repainted, as was the poplar countertop. Because we knew this would be a workhorse piece in my kitchen, all of the lead paint was removed, and only food safe finishes were used in their place. I love the patina of the wood and the squeaky old hardware. When I hired Brandon and Melissa, I knew I wanted to save and use the old piece, but none of us could really tell just how beautiful it was. Refinished, it now sits as the centerpiece of the kitchen, and I’m so happy we saved it.
The Wallpaper
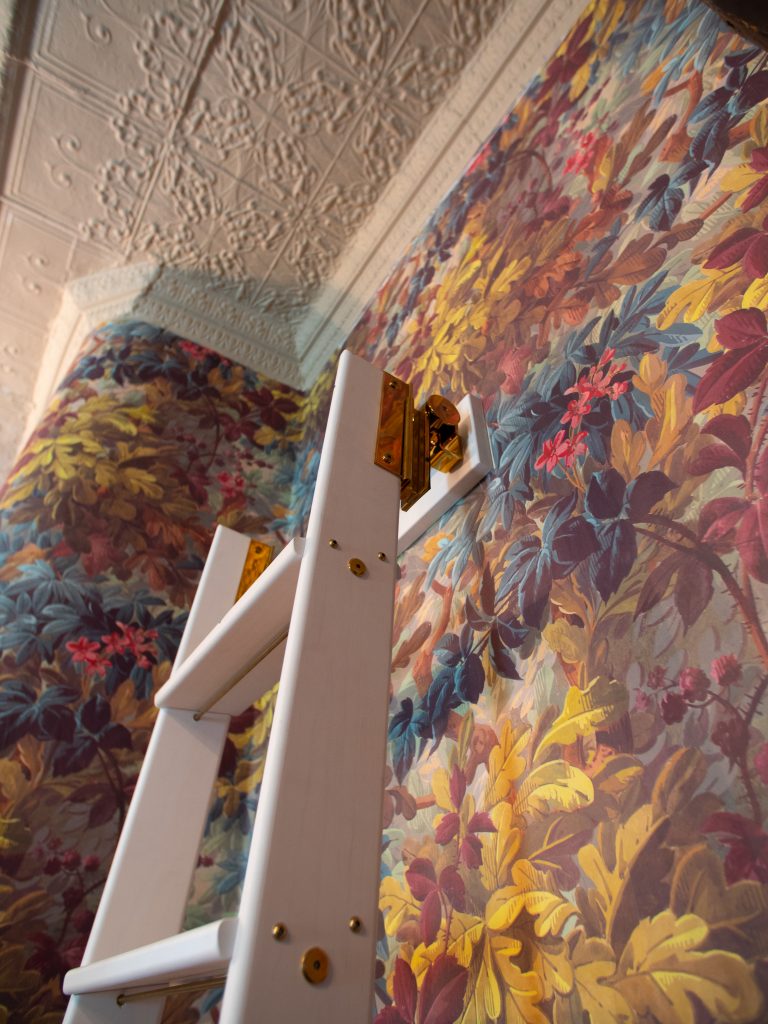
During my kitchen construction sabbatical, I took weeks to agonize over the wallpaper that would pull the space together. My inspiration for the entire kitchen came from deVOL, and so I had my heart set on an organic, leafy pattern. That didn’t stop me from ordering over a dozen samples and polling everyone that walked through my doors.
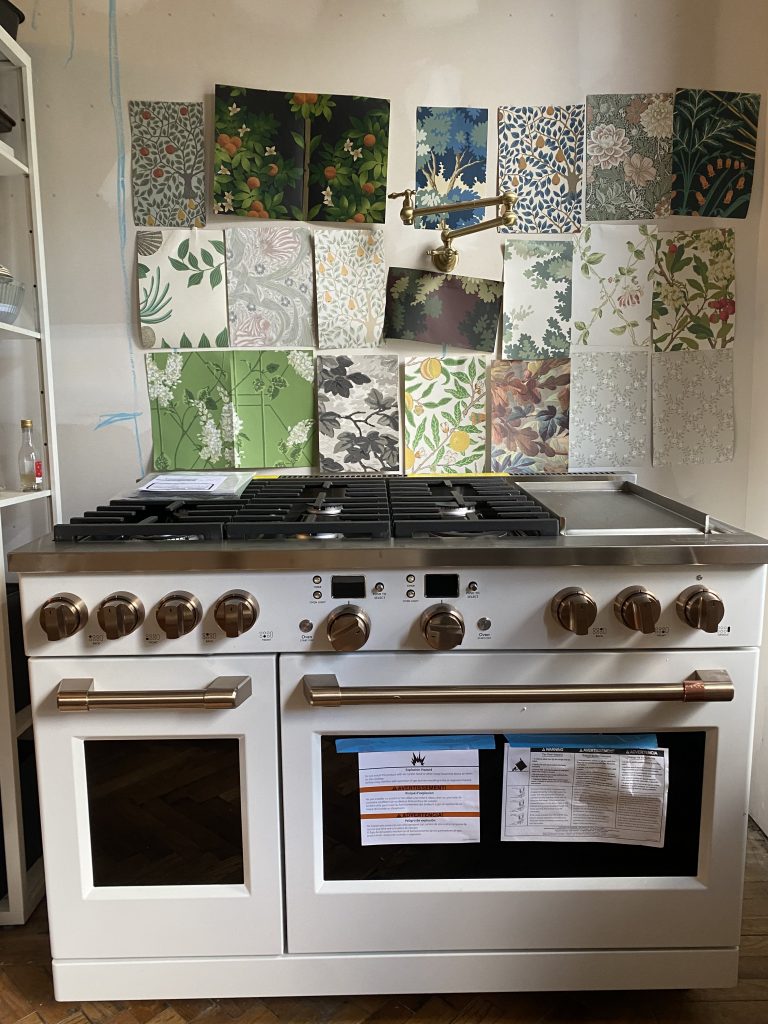
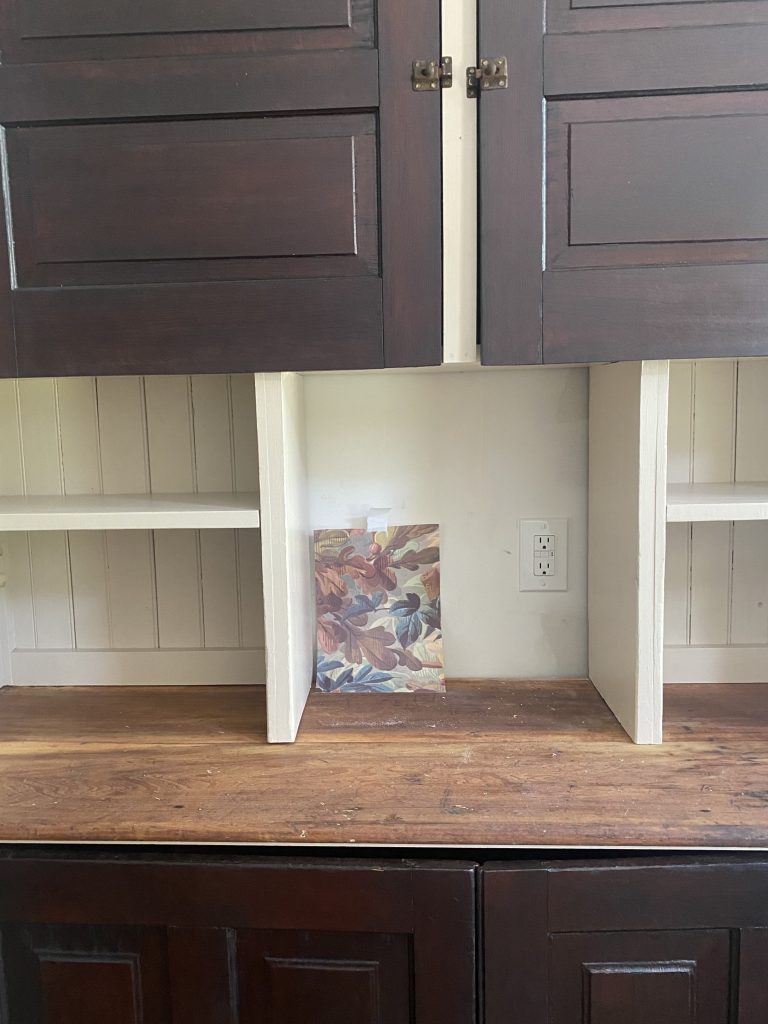
Ultimately, as is so often the case, the house told me exactly what it needed. I wanted a wallpaper that worked with the features of the house, not against them. That dark cherry faux graining is not a color you would typically think “kitchen”, and I needed a paper that complimented it, rather than forced it to scream RED. My first round of samples, though lovely, did not achieve this effect. In the second round, the Anglessy paper from Rebel Walls stood out immediately. Somehow managing to incorporate all the warm tones from my hardware, the cream of the trim and, most importantly, the faux bois. Seeing how rich and purpley the wood reads next to it had me completely sold, and my mom and I were back in the wallpaper hanging business in no time.

The Finishes
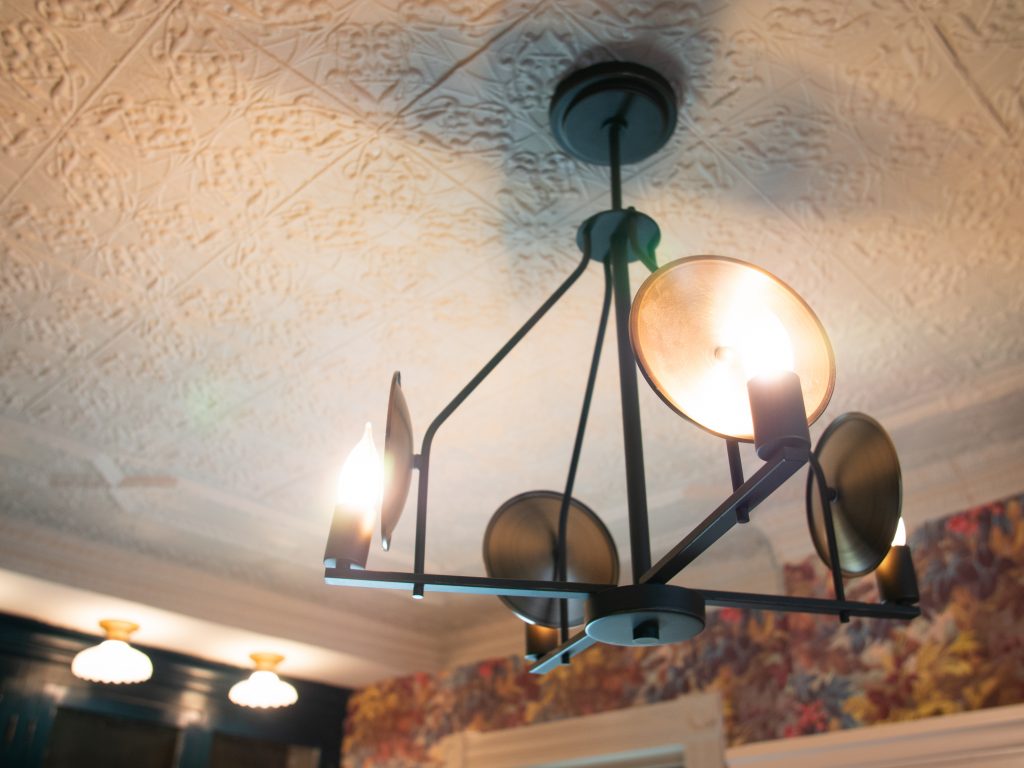
For an in depth account detailing the how and why of my finishes, you can read this previous blog post. I worked with Ferguson to pull it all together, from lighting to hardware to faucets.
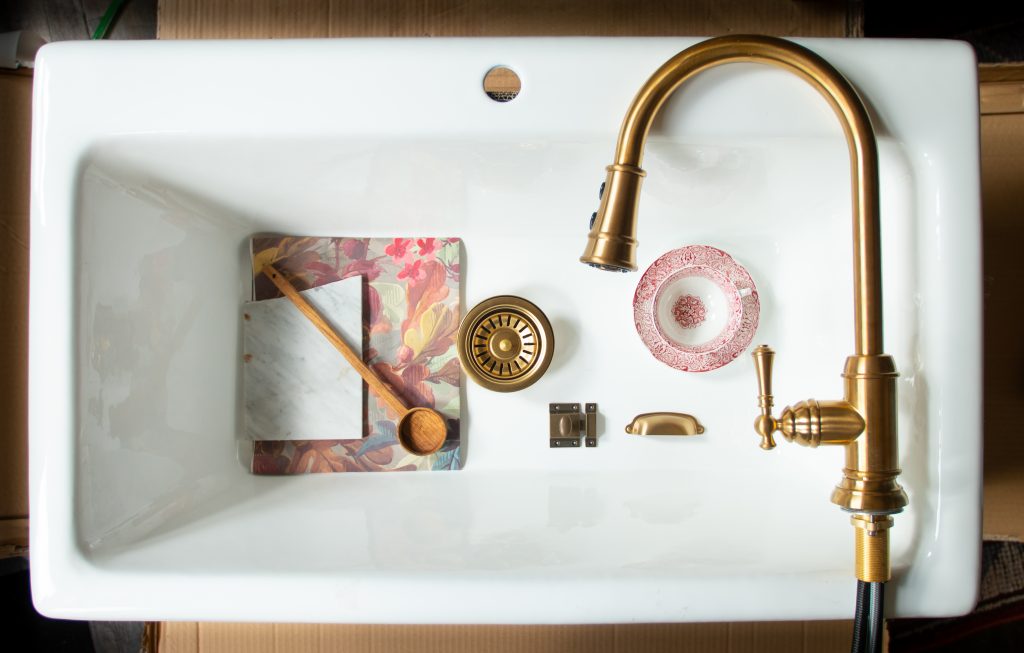
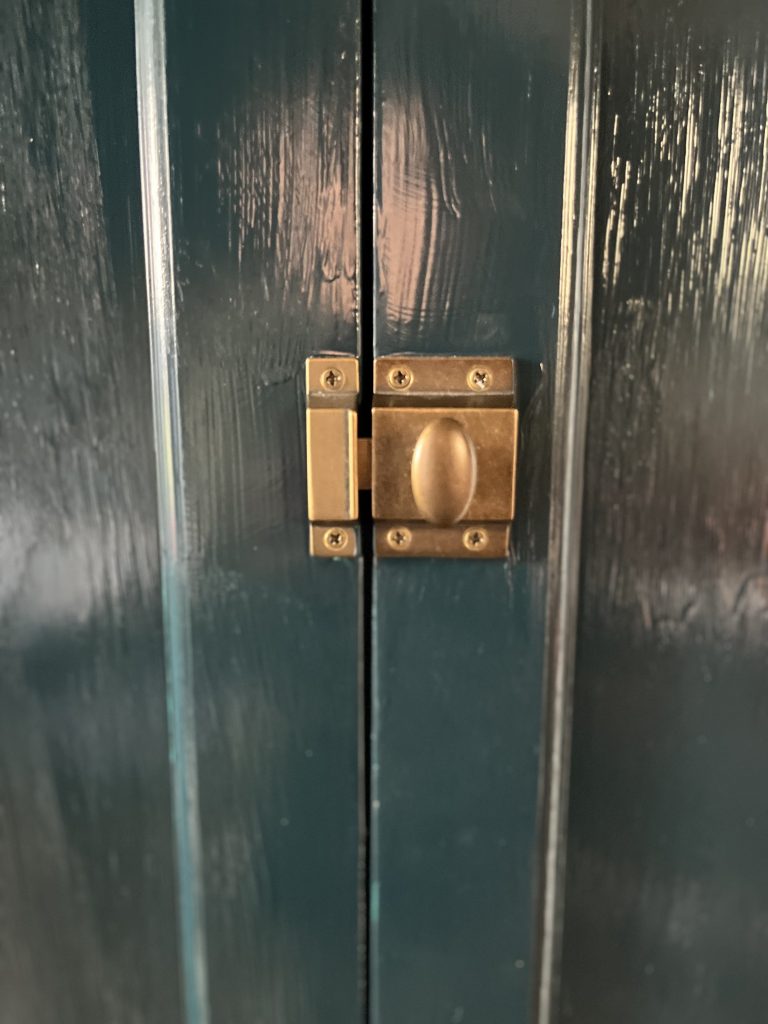
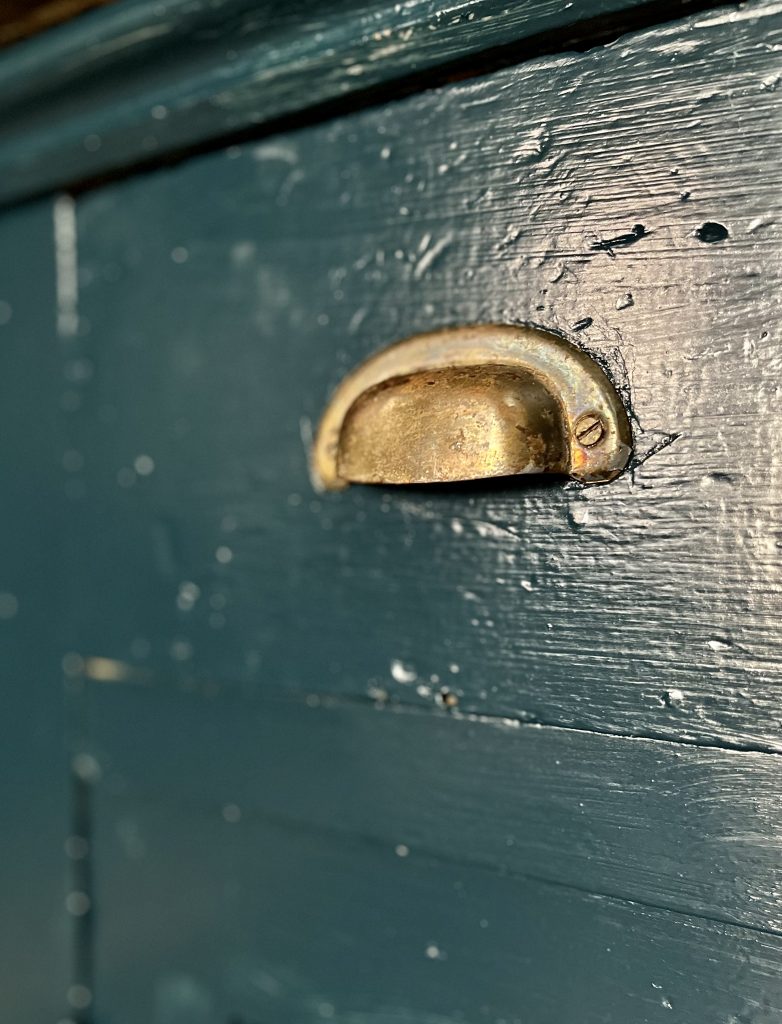
The hardware was the most important feature for me to make sure felt appropriate in the space. Some pieces would be on new cabinetry, while others replaced what was missing on the originals, and so picking something that worked seamlessly was a challenge. Once that was decided, I was able to layer in the sink, lighting, and faucet. Somehow, it ended up working together even better than I could have expected.
The Outstanding Items
Now, you may have noticed one major element that I haven’t addressed in this post… countertops. The countertops for this space have proven to be the greatest challenge, and one I honestly still haven’t dealt with. You may have also noticed I haven’t gone into great detail about the color I chose to paint the cabinets, this is directly tied to the aforementioned issue.
Throughout the process I had my heart set on butcher block, and part of me still does. The only problem being, I know what butcher block costs. It is extraordinarily cheap. Yet, ask anyone to fabricate a piece of butcherblock and install it and it triples in price. I simply cannot justify paying granite prices from some laminated pieces of wood.
Now you may be thinking, “well then, why not DIY it?”. Believe me, I thought about it. And if I had a brand new, level, new construction house, I would. But this countertop needs to be built up, fit a stretch of salvaged cabinets, and have a whole cut for a sink retrofitted into said salvaged cabinetry. Anyone that’s been around for a while knows I am not an enthusiastic carpenter, and so all that coupled with not being 100% sold on the surface, largely eliminated butcher block as an option.
That brings me to my next choice- Marble. NEVER could I have guessed the abject horror that would cross the faces of salesmen everywhere when I say I want marble. I am constantly warned of the stains, the scratches, the precious nature of this material that renders it practically useless. Frankly, no one in the valley really carries much marble, and when they do, they price it in such a way so that everyone is clear that it shouldn’t be considered a serious option. I actually stood in a stoneyard, while the lot attendant called his boss to try and convince him to sell me a piece of marble. We parted ways.
And so ultimately, I still do not have my sink or countertops installed. I am hopeful that in a month or so when things slow down at work, I’ll be able to hunt down a piece of marble or soapstone that fits my needs. Only then, will I be able to commit and comment on my choice of cabinet color. Or who knows, maybe there will be a Kitchen Reveal Part III
Because I know you all want to know, here are the links to the products installed in the space.
Generation lighting light: https://www.build.com/generation-lighting-cc1315/s1706313?uid&utm_source=influencer&utm_medium=social&utm_campaign=betsy-sweeny-fy22&utm_bg=build&utm_reach=national&utm_content=home_blog
Top Knobs cabinet pull: https://www.build.com/top-knobs-m2223/s1722763?uid&utm_source=influencer&utm_medium=social&utm_campaign=betsy-sweeny-fy22&utm_bg=build&utm_reach=national&utm_content=home_blog
Top Knobs cabinet latch: https://www.build.com/top-knobs-m1785/s601892?uid&utm_source=influencer&utm_medium=social&utm_campaign=betsy-sweeny-fy22&utm_bg=build&utm_reach=national&utm_content=home_blog
Signature Hardware faucet: https://www.build.com/signature-hardware-948399/s1689621?uid&utm_source=influencer&utm_medium=social&utm_campaign=betsy-sweeny-fy22&utm_bg=build&utm_reach=national&utm_content=home_blog
Signature Hardware sink: https://www.build.com/signature-hardware-927988-36-1/s1490868?uid&utm_source=influencer&utm_medium=social&utm_campaign=betsy-sweeny-fy22&utm_bg=build&utm_reach=national&utm_content=home_blog
Signature Hardware basket strainer: https://www.build.com/signature-hardware-926725-1/s1471917?uid=3457582&utm_source=influencer&utm_medium=social&utm_campaign=betsy-sweeny-fy22&utm_bg=build&utm_reach=national&utm_content=home_blog
Signature Hardware basket strainer and disposal stopper: https://www.build.com/signature-hardware-926725/s1471923?uid&utm_source=influencer&utm_medium=social&utm_campaign=betsy-sweeny-fy22&utm_bg=build&utm_reach=national&utm_content=home_blog
InSinkErator Garbage Disposal: https://www.build.com/insinkerator-excel/s502623?uid&utm_source=influencer&utm_medium=social&utm_campaign=betsy-sweeny-fy22&utm_bg=build&utm_reach=national&utm_content=home_blog
Anglessy Wallpaper https://www.wallpaperdirect.com/us/products/rebel-walls/anglessy/179519